How to Create and Send Professional Invoices Online (Step-by-Step Guide)
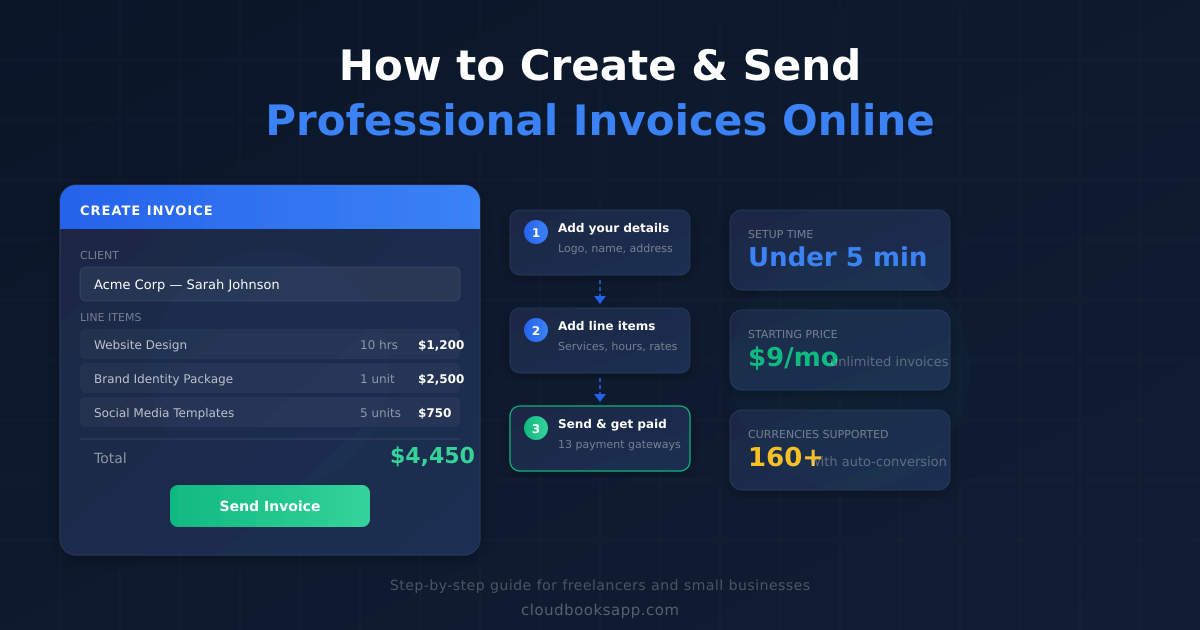
You finished the project. The client is happy. Now you need to get paid. But instead of sending an invoice in the next five minutes, you spend thirty minutes wrestling with a Word template, manually calculating tax, and emailing a PDF that your client has to print, sign, and mail a cheque for. Or worse — you delay invoicing for days because the process feels like a chore, and your cash flow suffers.
Online invoicing eliminates all of this. You create the invoice in a browser, the client receives it by email, they click a link and pay instantly with their preferred payment method. The entire cycle — from finishing the work to money landing in your account — can take minutes instead of weeks.
This guide walks through exactly how to create and send professional invoices online, whether you are a freelancer billing your first client or a small business looking to replace spreadsheets and Word documents with something faster.
What you need before you send your first invoice
Before you open any invoicing tool, gather these details. Having them ready means your first invoice takes under five minutes instead of an hour of hunting through emails and filing cabinets:
- Your business details: Legal business name (or your name if you are a sole proprietor), address, email, phone number, and tax registration number (GST, VAT, EIN, or your country's equivalent).
- Your logo: A PNG or SVG file, ideally at least 300px wide. This goes on every invoice and makes the difference between looking professional and looking like a side project.
- Your client's details: Company name, billing contact name, billing address, and email. If they have a purchase order number or VAT number, get that too — large companies will reject invoices without a PO reference.
- Your payment details: Bank account for direct deposits, or accounts with payment gateways like Stripe, PayPal, or any of the 13 gateways CloudBooks supports. Online invoicing software handles this automatically — the client clicks Pay and the money routes to your connected account.
- Your payment terms: Net 15, Net 30, due on receipt — whatever you have agreed with the client. If you have not discussed it, Net 14 is a reasonable default for freelancers. Shorter terms get you paid faster.
Step 1: Choose your invoicing method
You have three options, and they differ dramatically in how much time they cost you every month:
Option A: Word or Google Docs templates
Download an invoice template, fill in the fields, save as PDF, email it. This is free and works for your first few invoices, but it scales terribly. You are manually numbering invoices, manually calculating tax, manually tracking who has paid and who has not, and you have no way to accept online payments — the client has to arrange a bank transfer or write a cheque.
Best for: One-off invoices where you will not need to track payment status or send reminders.
Option B: Spreadsheet-based invoicing
Build an invoice template in Excel or Google Sheets with formulas for tax and totals. Slightly better than Word because the maths is automatic, but you still email PDFs manually, track payments in a separate tab, and have no online payment option.
Best for: People who enjoy spreadsheets and have fewer than five clients.
Option C: Online invoicing software
Purpose-built tools like CloudBooks, FreshBooks, or Wave handle the entire cycle: create the invoice, send it by email, let the client pay online, track the payment status, and send automatic reminders for overdue invoices. You also get professional templates, recurring invoices, multi-currency support, and reports — all in one place.
Best for: Anyone who sends more than a few invoices per month, or who wants to get paid faster with online payments. CloudBooks starts at $9/month with unlimited invoices.
The rest of this guide assumes Option C, because it is the approach that saves the most time and gets you paid fastest. If you are using Word templates and happy with them, the sections on what to include on an invoice and common mistakes still apply.
Step 2: Set up your invoicing profile
This is a one-time step. In your invoicing software, fill in:
- Business name and address — appears at the top of every invoice.
- Logo — upload it once, it is applied to all invoices automatically.
- Default payment terms — Net 14, Net 30, or whatever your standard is. You can override this per client.
- Tax settings — your tax rate(s) and registration number. For Indian businesses, configure CGST/SGST/IGST. For EU businesses, set your VAT rate and number. CloudBooks handles GST, VAT, and multi-tax configurations out of the box.
- Payment gateway — connect Stripe, PayPal, Razorpay, or whichever gateway your clients use. CloudBooks supports 13 gateways covering North America, Europe, India, Africa, the Middle East, Latin America, and Southeast Asia.
- Invoice numbering — set a prefix (INV-, CB-, your initials) and starting number. The software auto-increments from there.
This setup takes five minutes. Once done, every invoice you create inherits these defaults — you only fill in the client-specific details.
Step 3: Create the invoice
A professional invoice needs these elements. Miss any of them and you risk delays, disputes, or looking unprofessional:
The header
- Your business name, logo, and contact details
- The word "Invoice" — sounds obvious, but some businesses send documents that look like invoices without actually labelling them, which causes confusion in accounting departments
- Invoice number — unique and sequential. Your software generates this automatically.
- Invoice date — the date you are issuing the invoice, not the date the work was done.
- Due date — calculated from your payment terms. Net 30 from October 12 = due November 11.
The client section
- Client company name and billing address
- Contact person — the person who approves payment, not necessarily your project contact.
- PO number — if the client issued a purchase order, include it. Large companies match invoices to POs, and an invoice without one sits in a queue until someone manually routes it.
- Tax registration number — required for B2B invoicing in many jurisdictions (EU VAT number, Indian GSTIN).
The line items
This is the core of the invoice. Each line item should have:
- Description — what you did. "Website design" is adequate. "Website design — 5-page responsive site with contact form and CMS integration per SOW dated Sept 15" is better, because it ties the invoice to a specific agreement and leaves no room for "what is this charge for?" conversations.
- Quantity — hours, units, days, or a flat "1" for project-based billing.
- Rate — your hourly rate, unit price, or project fee.
- Amount — quantity multiplied by rate. Your software calculates this.
If you use time tracking, the best invoicing tools let you convert tracked hours directly into invoice line items — no manual entry required. You select the unbilled time entries, click "Create Invoice," and the descriptions, hours, rates, and amounts are pre-filled from your time logs.
The totals
- Subtotal — sum of all line items before tax.
- Tax — itemised by type. If you charge GST, show CGST and SGST (or IGST) separately with their rates and amounts. If VAT, show the rate and amount. If exempt or zero-rated, note why ("Exported services — zero-rated" or "Reverse charge applies").
- Discount — if applicable. Show the original subtotal, the discount amount, and the discounted subtotal so the client sees the value.
- Total due — the final amount the client needs to pay, in the invoice currency.
The footer
- Payment instructions — if using online invoicing software, this is handled automatically with a "Pay Now" button. If sending a PDF, include your bank details (account name, number, routing/IFSC/IBAN, bank name).
- Late payment terms — optional but useful. "A 1.5% monthly late fee applies to invoices overdue by more than 14 days" motivates timely payment.
- Notes — a thank-you line, project reference, or any special terms. Keep it to one or two sentences.
Step 4: Send the invoice
With online invoicing software, sending is one click. The client receives an email with the invoice details and a prominent "Pay Now" button that opens a secure payment page. They choose their preferred payment method — credit card, bank transfer, UPI, iDEAL, or whatever their local gateway supports — and pay immediately.
A few things that improve your payment speed:
- Send the invoice the day the work is delivered. Not next week, not at the end of the month. The longer you wait, the less urgent it feels to the client. Studies show invoices sent within 24 hours of project completion are paid 1.5x faster than those sent a week later.
- Include a clear subject line. "Invoice #0042 from [Your Business] — due Oct 26" tells the client exactly what the email is, when to pay, and who it is from. Avoid generic subjects like "Invoice attached."
- Invoice in the client's currency. A client in Germany who receives a USD invoice has to mentally convert the amount and gets surprised by the final charge after bank conversion. An invoice in EUR removes that friction. CloudBooks supports 160+ currencies with automatic conversion.
- Offer multiple payment methods. Not every client uses Stripe. Not every client has PayPal. If your client is in India, Razorpay with UPI is the fastest path to payment. If they are in the Netherlands, iDEAL through Mollie is how they expect to pay. More payment options means fewer excuses for late payment.
Step 5: Automate the follow-up
The invoice is sent. Now what? If you are manually checking whether each invoice has been paid and sending follow-up emails to late payers, you are spending hours on work that software handles in the background.
Set up automatic payment reminders:
- 3 days before due date: A friendly reminder that the invoice is coming due. This catches clients who meant to pay but forgot.
- On the due date: A direct notification that payment is due today.
- 7 days overdue: A firmer follow-up noting the invoice is past due.
- 14 days overdue: An escalation with the late fee applied (if your terms include one).
These reminders go out automatically while you focus on client work. You do not need to track due dates in your calendar or write awkward "just checking in" emails. The software handles it, consistently and professionally, for every invoice.
What makes a good online invoicing tool
Not all invoicing software is equal. Here is what separates tools that save you time from tools that just move the paperwork from Word to a browser:
| Feature | Why it matters |
|---|---|
| Unlimited invoices | Some tools cap invoices on lower plans. If you bill 10 clients weekly, a 20-invoice cap means upgrading immediately. Look for unlimited from the start. |
| Online payments | A "Pay Now" button on every invoice means clients pay in seconds. Without it, you are back to chasing bank transfers. |
| Multiple payment gateways | One gateway does not fit all clients. CloudBooks offers 13 — Stripe, PayPal, Razorpay, Paystack, Flutterwave, Mollie, GoCardless, and more. |
| Automatic reminders | Eliminates manual follow-up. The software chases late payers so you do not have to. |
| Time tracking | Track hours and convert them to invoice line items in one click. No spreadsheet, no manual entry. |
| Recurring invoices | Set up a monthly retainer invoice once. It sends automatically on the same date every month. |
| Multi-currency | Invoice international clients in their currency. 160+ currencies supported. |
| Professional templates | Clean, branded invoices with your logo and colours. First impressions matter. |
| Expense tracking | Track business expenses alongside income for accurate profit reporting at tax time. |
| Reports | See outstanding invoices, revenue by client, payment trends — all without building spreadsheets. |
How the popular tools compare
| Tool | Unlimited invoices | Online payments | Time tracking | Starting price |
|---|---|---|---|---|
| CloudBooks | Yes, all plans | 13 gateways | Built in | $9/mo |
| FreshBooks | 5 clients on Lite | Stripe + PayPal | Built in | $19/mo |
| Wave | Yes | Stripe (2.9% + $0.60) | None | Free |
| QuickBooks | Yes | QuickBooks Payments | Plus plan only ($115/mo) | $30/mo |
| Xero | 20 on Starter | Stripe + GoCardless | Projects add-on | $20/mo |
| Zoho Invoice | Yes | Multiple | Built in | Free (5 clients) |
If you are a freelancer or small service business, the key factors are unlimited invoices (so you do not hit caps), built-in time tracking (so billing hourly clients is seamless), and multiple payment gateways (so every client can pay easily regardless of their country).
Common invoicing mistakes that delay payment
These are the errors that turn a five-day payment cycle into a five-week one:
Missing or wrong PO number
Corporate clients route invoices through accounts payable systems that match invoice PO numbers to approved purchase orders. If the PO number is missing, wrong, or expired, the invoice gets stuck. Always confirm the PO number before invoicing, and include it prominently on the invoice.
Vague line items
"Consulting services — $5,000" invites questions. "Brand strategy workshop (2 days) + competitive analysis report + positioning recommendations per SOW dated Sept 1 — $5,000" does not. The more specific your line items, the fewer back-and-forth emails before payment.
Wrong tax calculation
Charging VAT when the client qualifies for reverse charge, applying the wrong GST rate, or forgetting sales tax entirely — all of these trigger corrections and reissues that add weeks to the payment timeline. Configure your tax settings correctly once in your invoicing software and let it calculate automatically.
No online payment option
An invoice that requires a bank transfer means the client has to log into their banking portal, find your bank details, type them in, and initiate the transfer. An invoice with a "Pay Now" button means they click once and pay with their card. The friction difference is enormous — businesses that add online payment options to their invoices get paid on average 11 days faster.
Invoicing late
The number one reason freelancers get paid late is that they invoice late. If you finish the work on Monday and invoice on Friday, the client has already moved on mentally. Invoice the same day the work is delivered, while the value is fresh in the client's mind.
Not sending reminders
Clients are busy. An invoice that arrives, gets skimmed, and gets buried under fifty other emails will not get paid without a nudge. Automatic reminders are not rude — they are professional. Every serious invoicing tool supports them.
Recurring invoices: set it and forget it
If you have retainer clients who pay the same amount every month, recurring invoices eliminate the monthly invoice-creation ritual entirely. Set up the invoice once — client, line items, amount, payment terms — choose the recurrence (weekly, monthly, quarterly), and the software creates and sends the invoice automatically on the scheduled date.
This is particularly valuable for:
- Monthly retainers — design, development, marketing, or consulting agreements with a fixed monthly fee.
- Subscription services — if you offer a productised service (managed hosting, ongoing maintenance, monthly content packages).
- Rent and lease payments — if you sublease office space or equipment to other businesses.
Combined with automatic payment reminders, a recurring invoice can run entirely on autopilot — created, sent, reminded, and paid without you touching it once.
Invoicing for different business types
Freelancers and consultants
Bill by the hour using time tracking integrated with invoicing. Track your hours as you work, then convert them to invoice line items in one click. Set payment terms to Net 14 or shorter — freelancers have less leverage on late payments than large vendors, so shorter terms and automatic reminders are critical.
Creative agencies
Use project-based invoicing with milestone payments. A common structure: 30% upfront deposit, 30% at first draft, 40% on delivery. Each milestone is a separate invoice tied to a deliverable, so the client knows exactly what they are paying for at each stage.
Service businesses
Combine fixed and variable line items on the same invoice — a monthly retainer fee plus additional hours at an agreed rate. Good invoicing software handles mixed billing without workarounds.
International businesses
Invoice in the client's local currency and offer payment gateways that work in their region. A client in India expects to pay via UPI through Razorpay. A client in the Netherlands expects iDEAL through Mollie. A client in Nigeria expects Paystack. CloudBooks supports all of these from a single dashboard.
Getting started
The best invoicing setup is the one that lets you go from finished work to sent invoice in under five minutes. No templates to download, no PDFs to email, no bank details to type out. Create the invoice, click send, and the client pays online with their preferred method.
CloudBooks gives you unlimited professional invoices, built-in time tracking, automatic payment reminders, recurring invoices, expense tracking, and 13 payment gateways covering clients worldwide — starting at $9/month. No per-invoice fees. No client caps on any paid plan.
Stop chasing payments. Start sending invoices that get paid.
Ready to streamline your invoicing?
Join 30,000+ businesses using CloudBooks to get paid faster.
Start Free TrialRelated Articles
How to Track Billable Hours and Invoice Clients Faster
You finish a three-hour design session for a client. You meant to start the timer, but you forgot. N...
Accounting Software vs Invoicing Software: Which Does Your Business Actually Need?
You search for "best accounting software for small business" and get a wall of results: QuickBooks, ...
How to Accept International Payments as a Freelancer in 2026
You land a client in Berlin, another in Lagos, a third in São Paulo. The work goes well. Then the in...